
It starts with an Amberlight image at it’s heart…
In this post I’m going to show you a few steps in the process that went into the making of ‘The Dancer’ – a piece of artwork that has an Amberlight image at it’s heart. Please note, this article is not designed to be a tutorial!
I reviewed a piece of software called Amberlight a while back. Within that review I talked about what’s possible ‘Out of the Box’ and also talked about more advanced work and the additional possibilities if you have any other image editing software available to you. This can take much more time and effort, but as you’ll see below and in my gallery, Amberlight can be used very creatively to make some pretty impressive artworks and special effects – particularly abstract art.
Post-processing and additional image manipulation tools
To create many of my artworks, I use additional software to post-process raw Amberlight images. The main software I use is Adobe Photoshop – but you could also use one of the many free image manipulation/editing software packages available to download such as GIMP. Occasionally I’ll use other plugins, or software too. For this project I also used a kaleidoscope image generator.
Stage 1 & 2 – The Amberlight Image
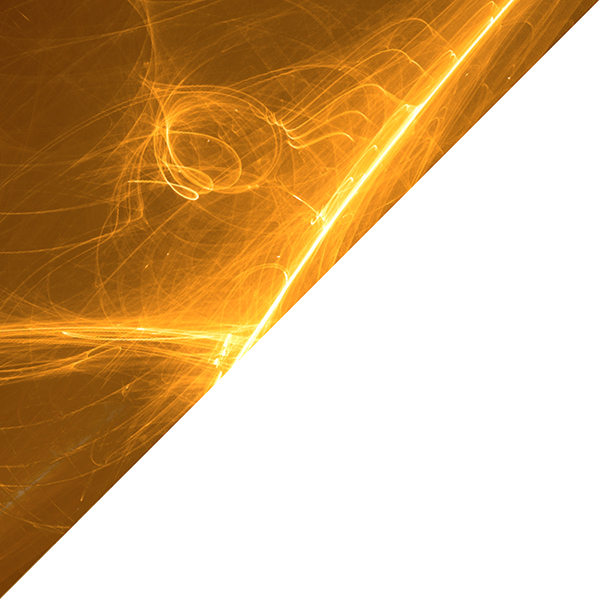
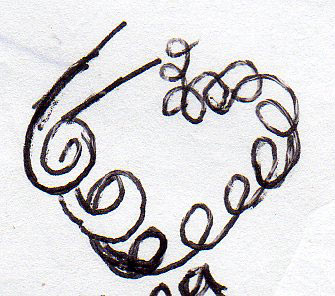
For this particular artwork, I took a section of a larger previously generated Amberlight image (unfortunately I don’t have the complete original image any longer). The picture below shows the chosen section. It is a triangle, because this area can then be used to create a kaleidoscopic effect using plugins, manipulation in Photoshop, or stand alone software. Free kaleidoscopic effect plugins and software are available online.
The Chosen Section of the Amberlight Image:
The image once I’d applied the kaleidoscopic filter:
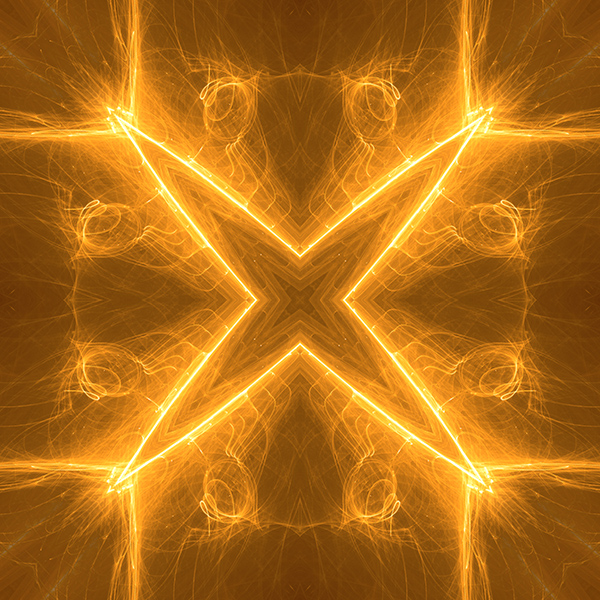
A kaleidoscopic filter often creates satisfying uniform patterns. But it was at this point I decided to create something more from the image than just a pattern – something unique, but with more depth, still abstract, but with a recognisable image. Thinking that the four points could become arms and legs, I set about using Photoshop to alter the image.
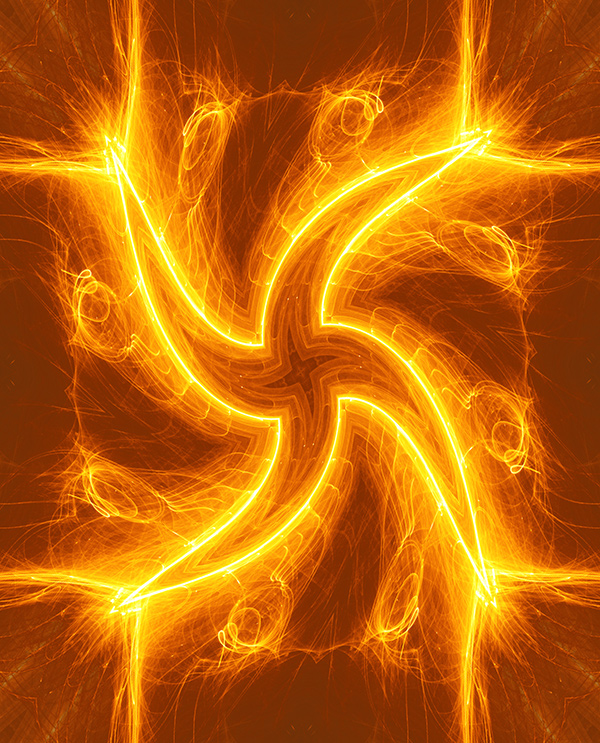
Stage 3 – Give Me a Twirl!
I used the Filter – Distort – Twirl tool with low distortion settings along with darkening and adding contrast to the image first to end up with this:
Stage 4 – Very Warped!
The next stage was to use Photoshop’s Filter – Liquify tool and brush to distort the image further to get a more human form. As I was doing this, I noticed that the areas where the hands and feet would be looked like flames and had great movement because of the nature of the Amberlight swirls. This prompted me to think about colours…
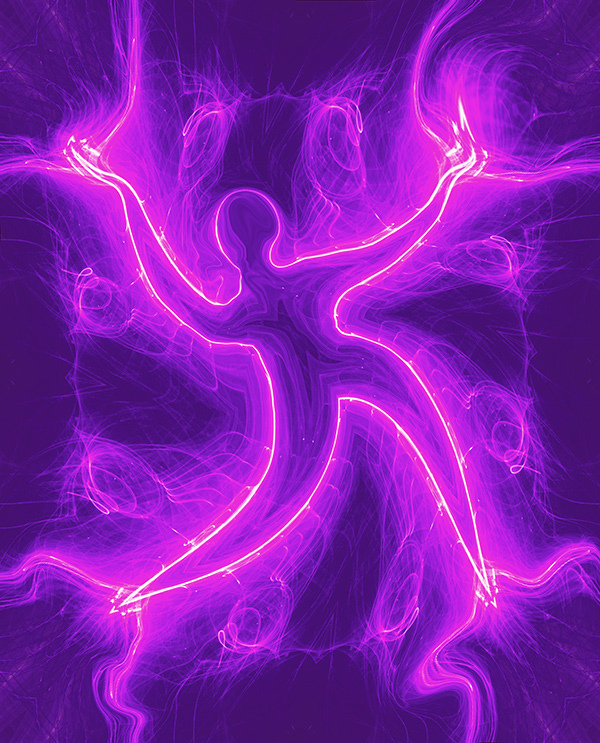
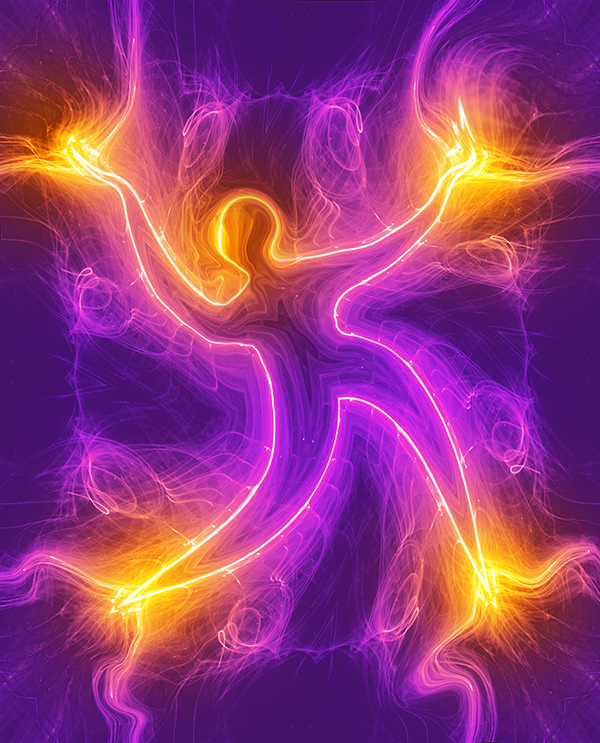
Stage 5 & 6 – Colour Me Right
The following two pictures show how I colourised my yellow/orange image on a new layer in Photoshop, to make it purple, and then deleted parts so the yellow would show through around the hands and feet giving the image more life…
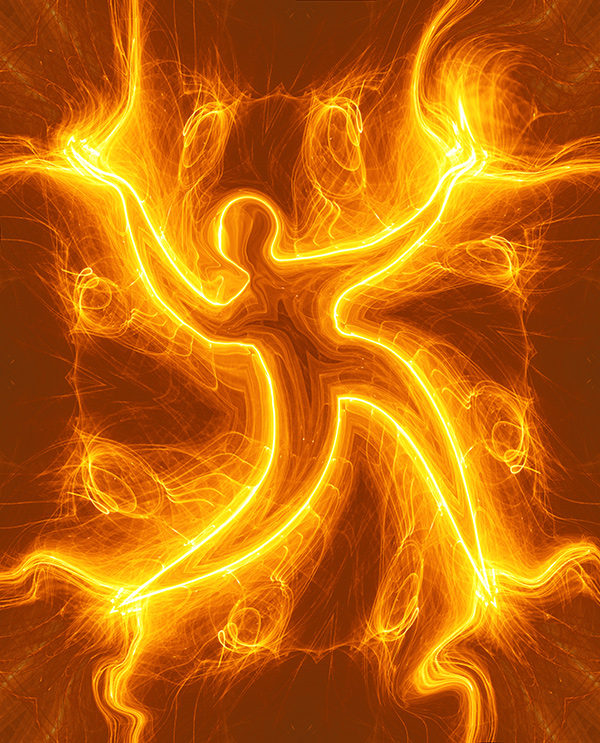
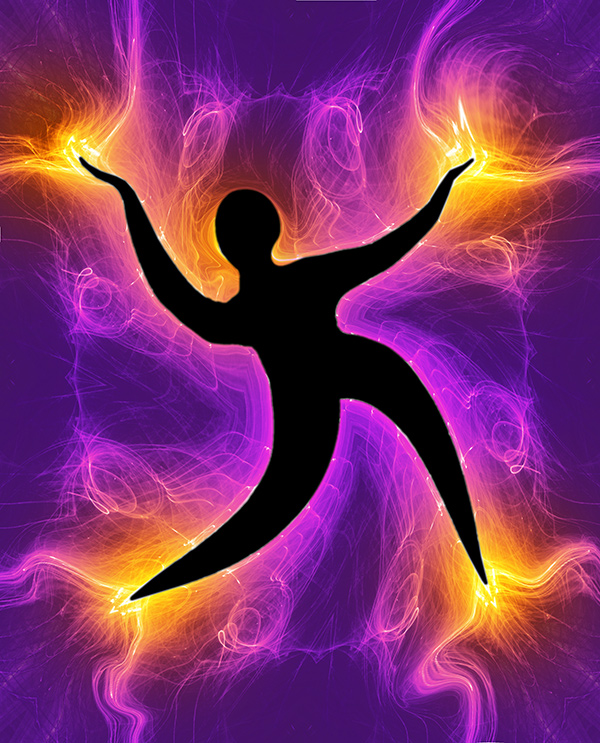
Stage 7 – Finishing Touch
Finally, I wanted to give the figure slightly more definition. For this I created a solid shape on a new layer in Photoshop…
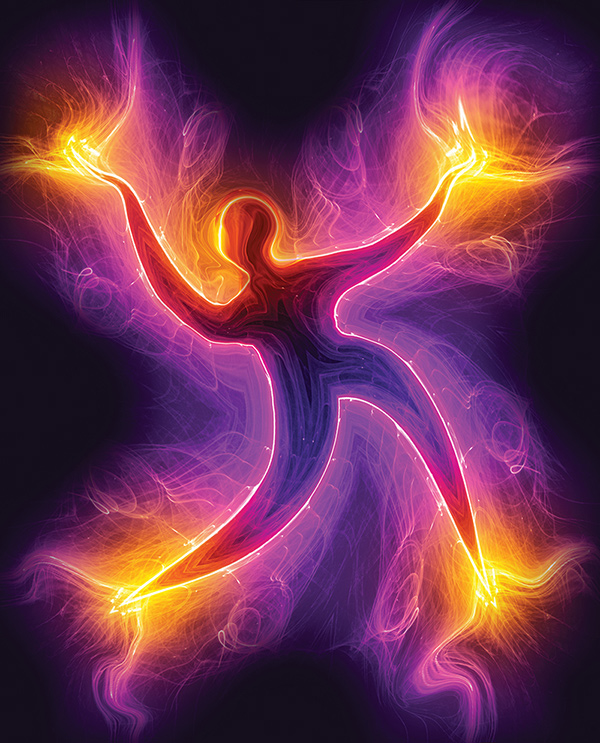
I then applied an opacity setting to the layer called ‘Soft Light’, which completed the artwork.
Here is the final image:
See more creations using Amberlight in the gallery on Escape Motions website
For some more inspiration, visit the Amberlight gallery. If you make some artwork using the application, you can post it to their gallery – let me know too – I’d love to see it!
For more information about Amberlight, click here.
